Cornrow Quilt Tutorial
I love how effective this quilt is for such an easy pattern! This quilt is a great option for beginners, or more experienced quilters who just feel like making a quick to put together quilt. It is also super easy to adjust to your preferences.
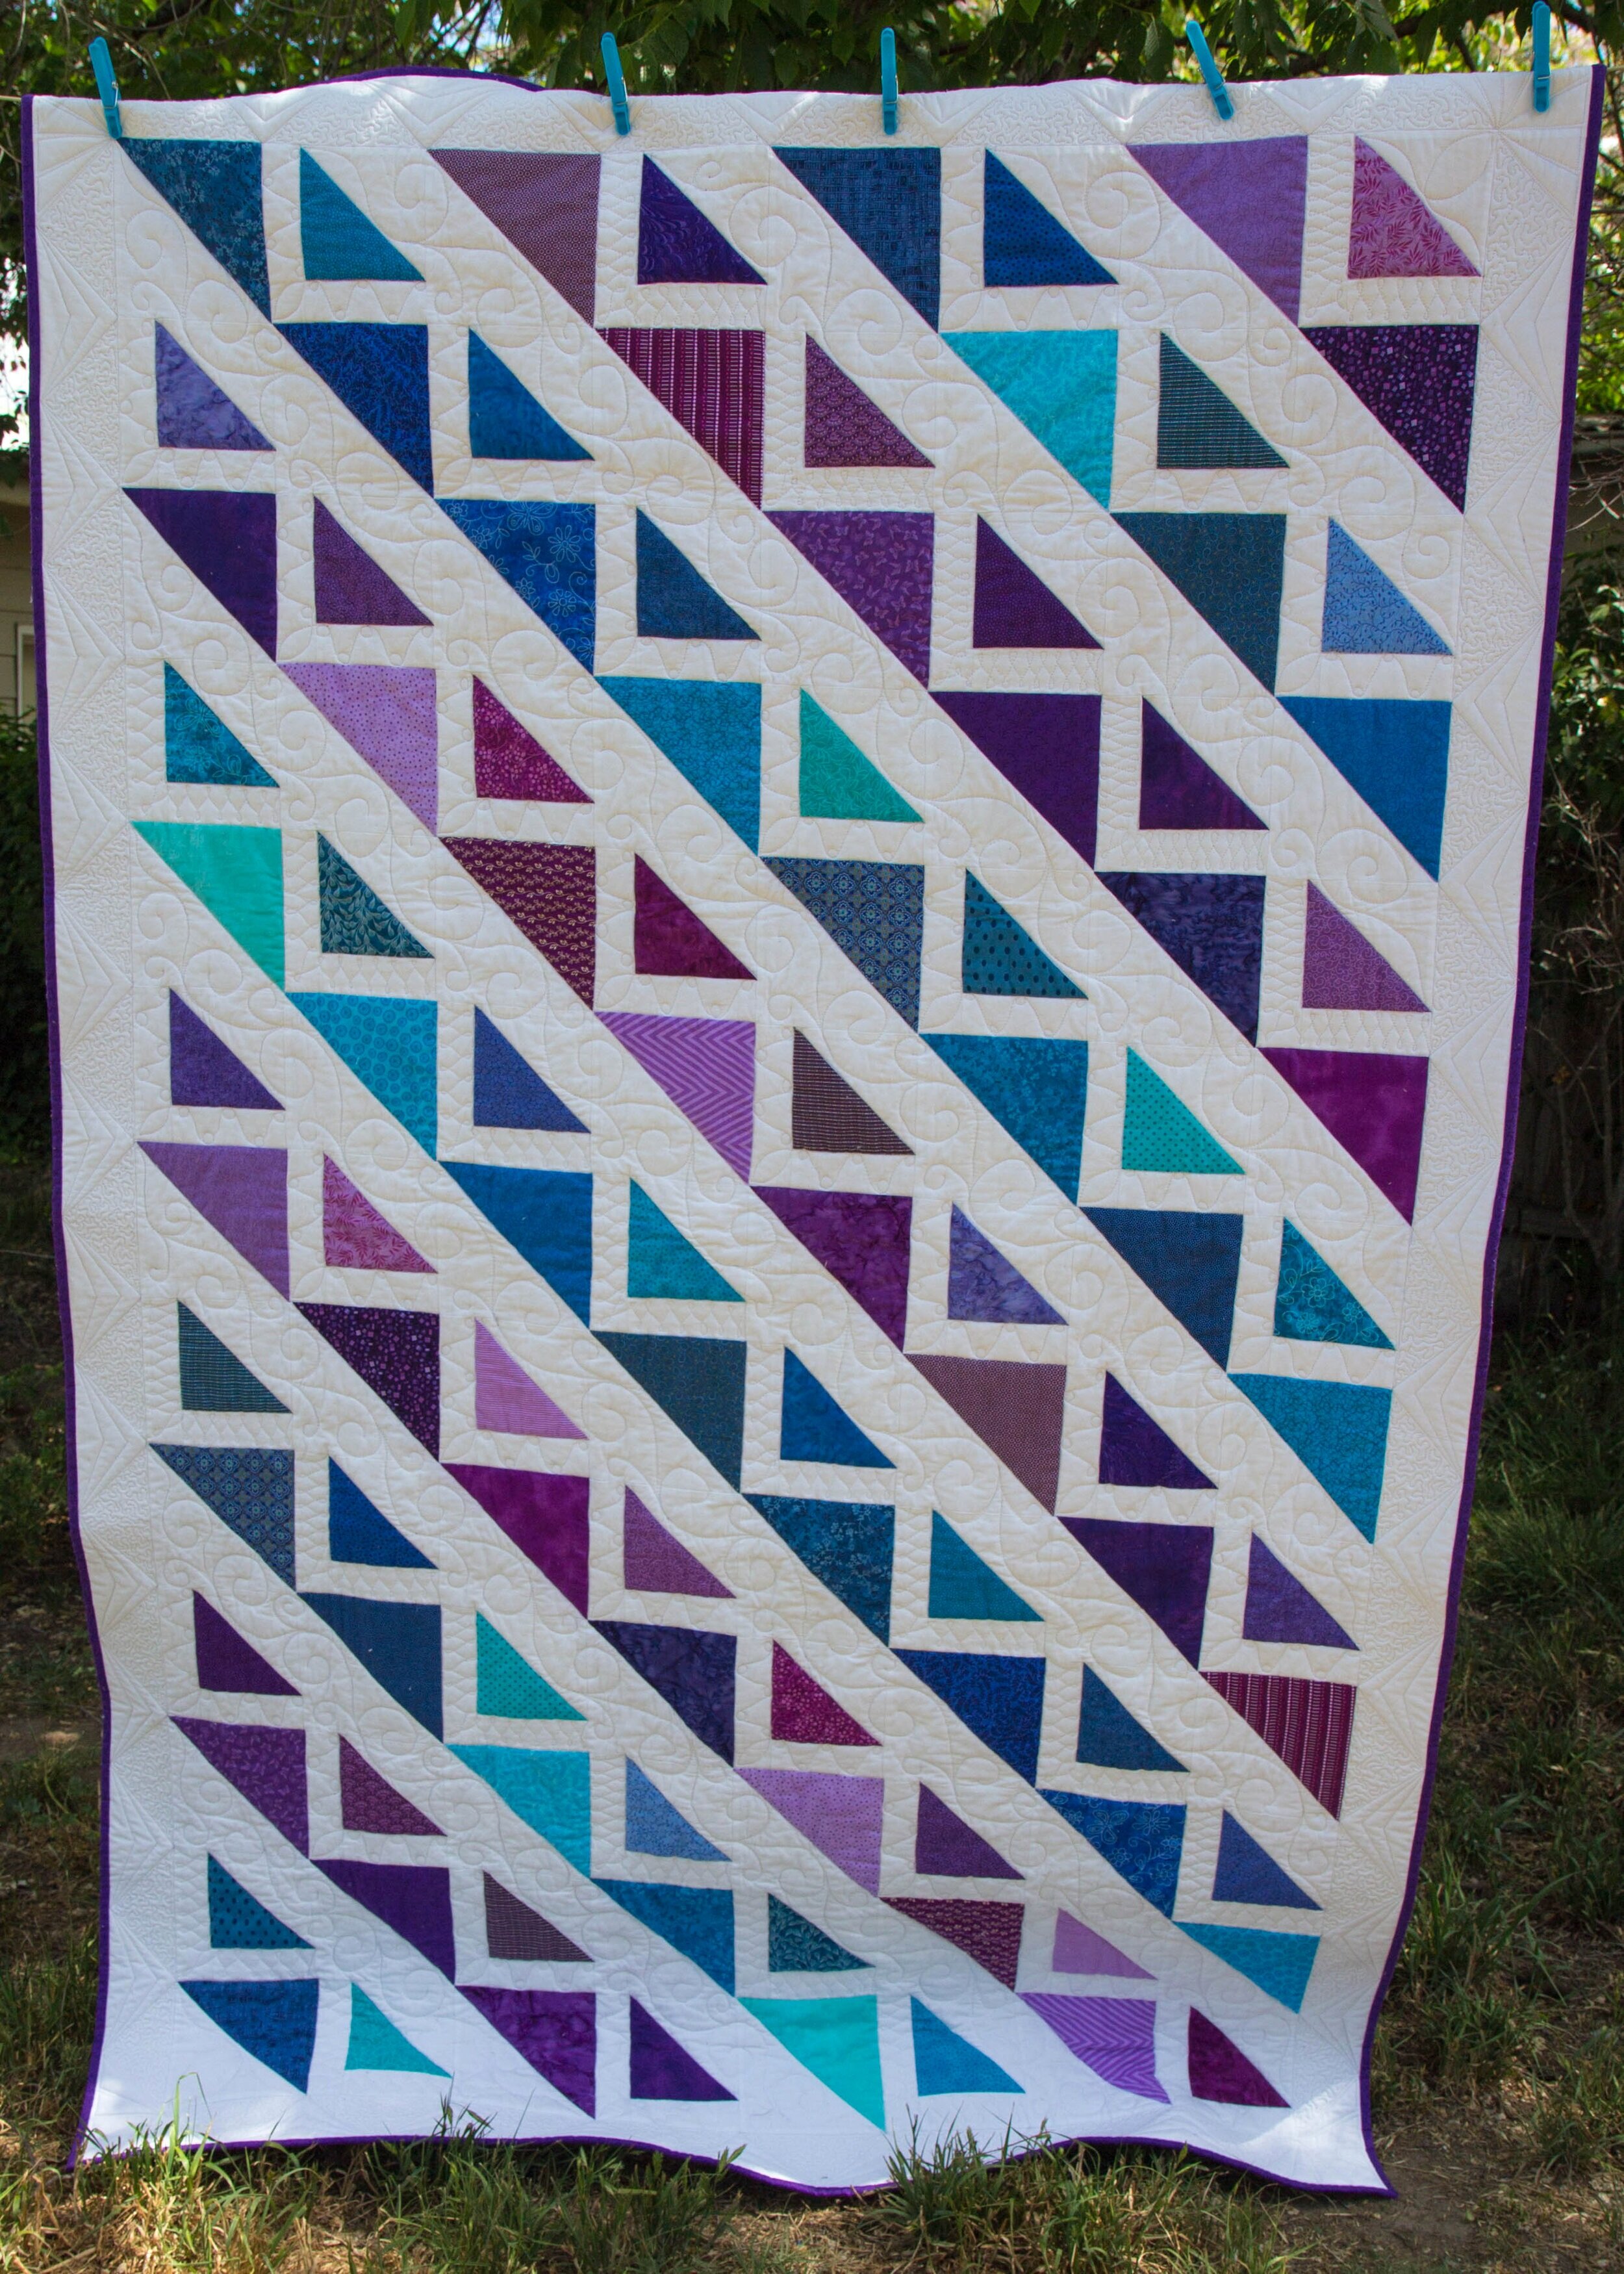
The corn rows are made up almost entirely of half-square-triangles. I like to make my half-square-triangles two at a time from two square pieces of fabric, but feel free to use any method you like. Here is a detailed tutorial on my favourite method: Half-Square-Triangle Tutorial
The blocks are really just two different sized half-square-triangles, so feel free to change them to whatever sizes you would like. I pretty much just decided on 6 inch squares and then off I went.
To make your quilt to the same measurements as mine you first need to cut the squares for your half-square-triangles (HST). I've made my blocks 6 inches square, 8 blocks across and 13 blocks down to fit a king single bed, if you want a bigger or smaller quilt just use more or less blocks to suit. So, in total you need 104 blocks! 52 large HST and 52 small ones. To make these you will need:
Large HSTs:

- 26 white 7 inch squares
- 13 blue 7 inch squares
- 13 purple 7 inch squares
Small HSTs:
- 26 white 5½ inch squares
- 13 blue 5½ inch squares
- 13 purple 5½ inch squares
You will also need:
- 52 white 2x5 inch rectangles
- 52 white 2x6½ inch rectangles
Next you need to make you half square triangles:
- On the wrong side of the fabric, draw a line diagonally across each white square.
- Place a white square on top of a coloured square of the same size, right sides together.
- Sew a ¼ inch seam on both sides of the drawn line.
- Cut between the two lines of stitching (this will be on your drawn line).
- Open up your two new blocks and press to the coloured side.
- Repeat with remaining squares.
- Trim blocks to size, large: 6½ x 6½ inches, small: 5x5 inches

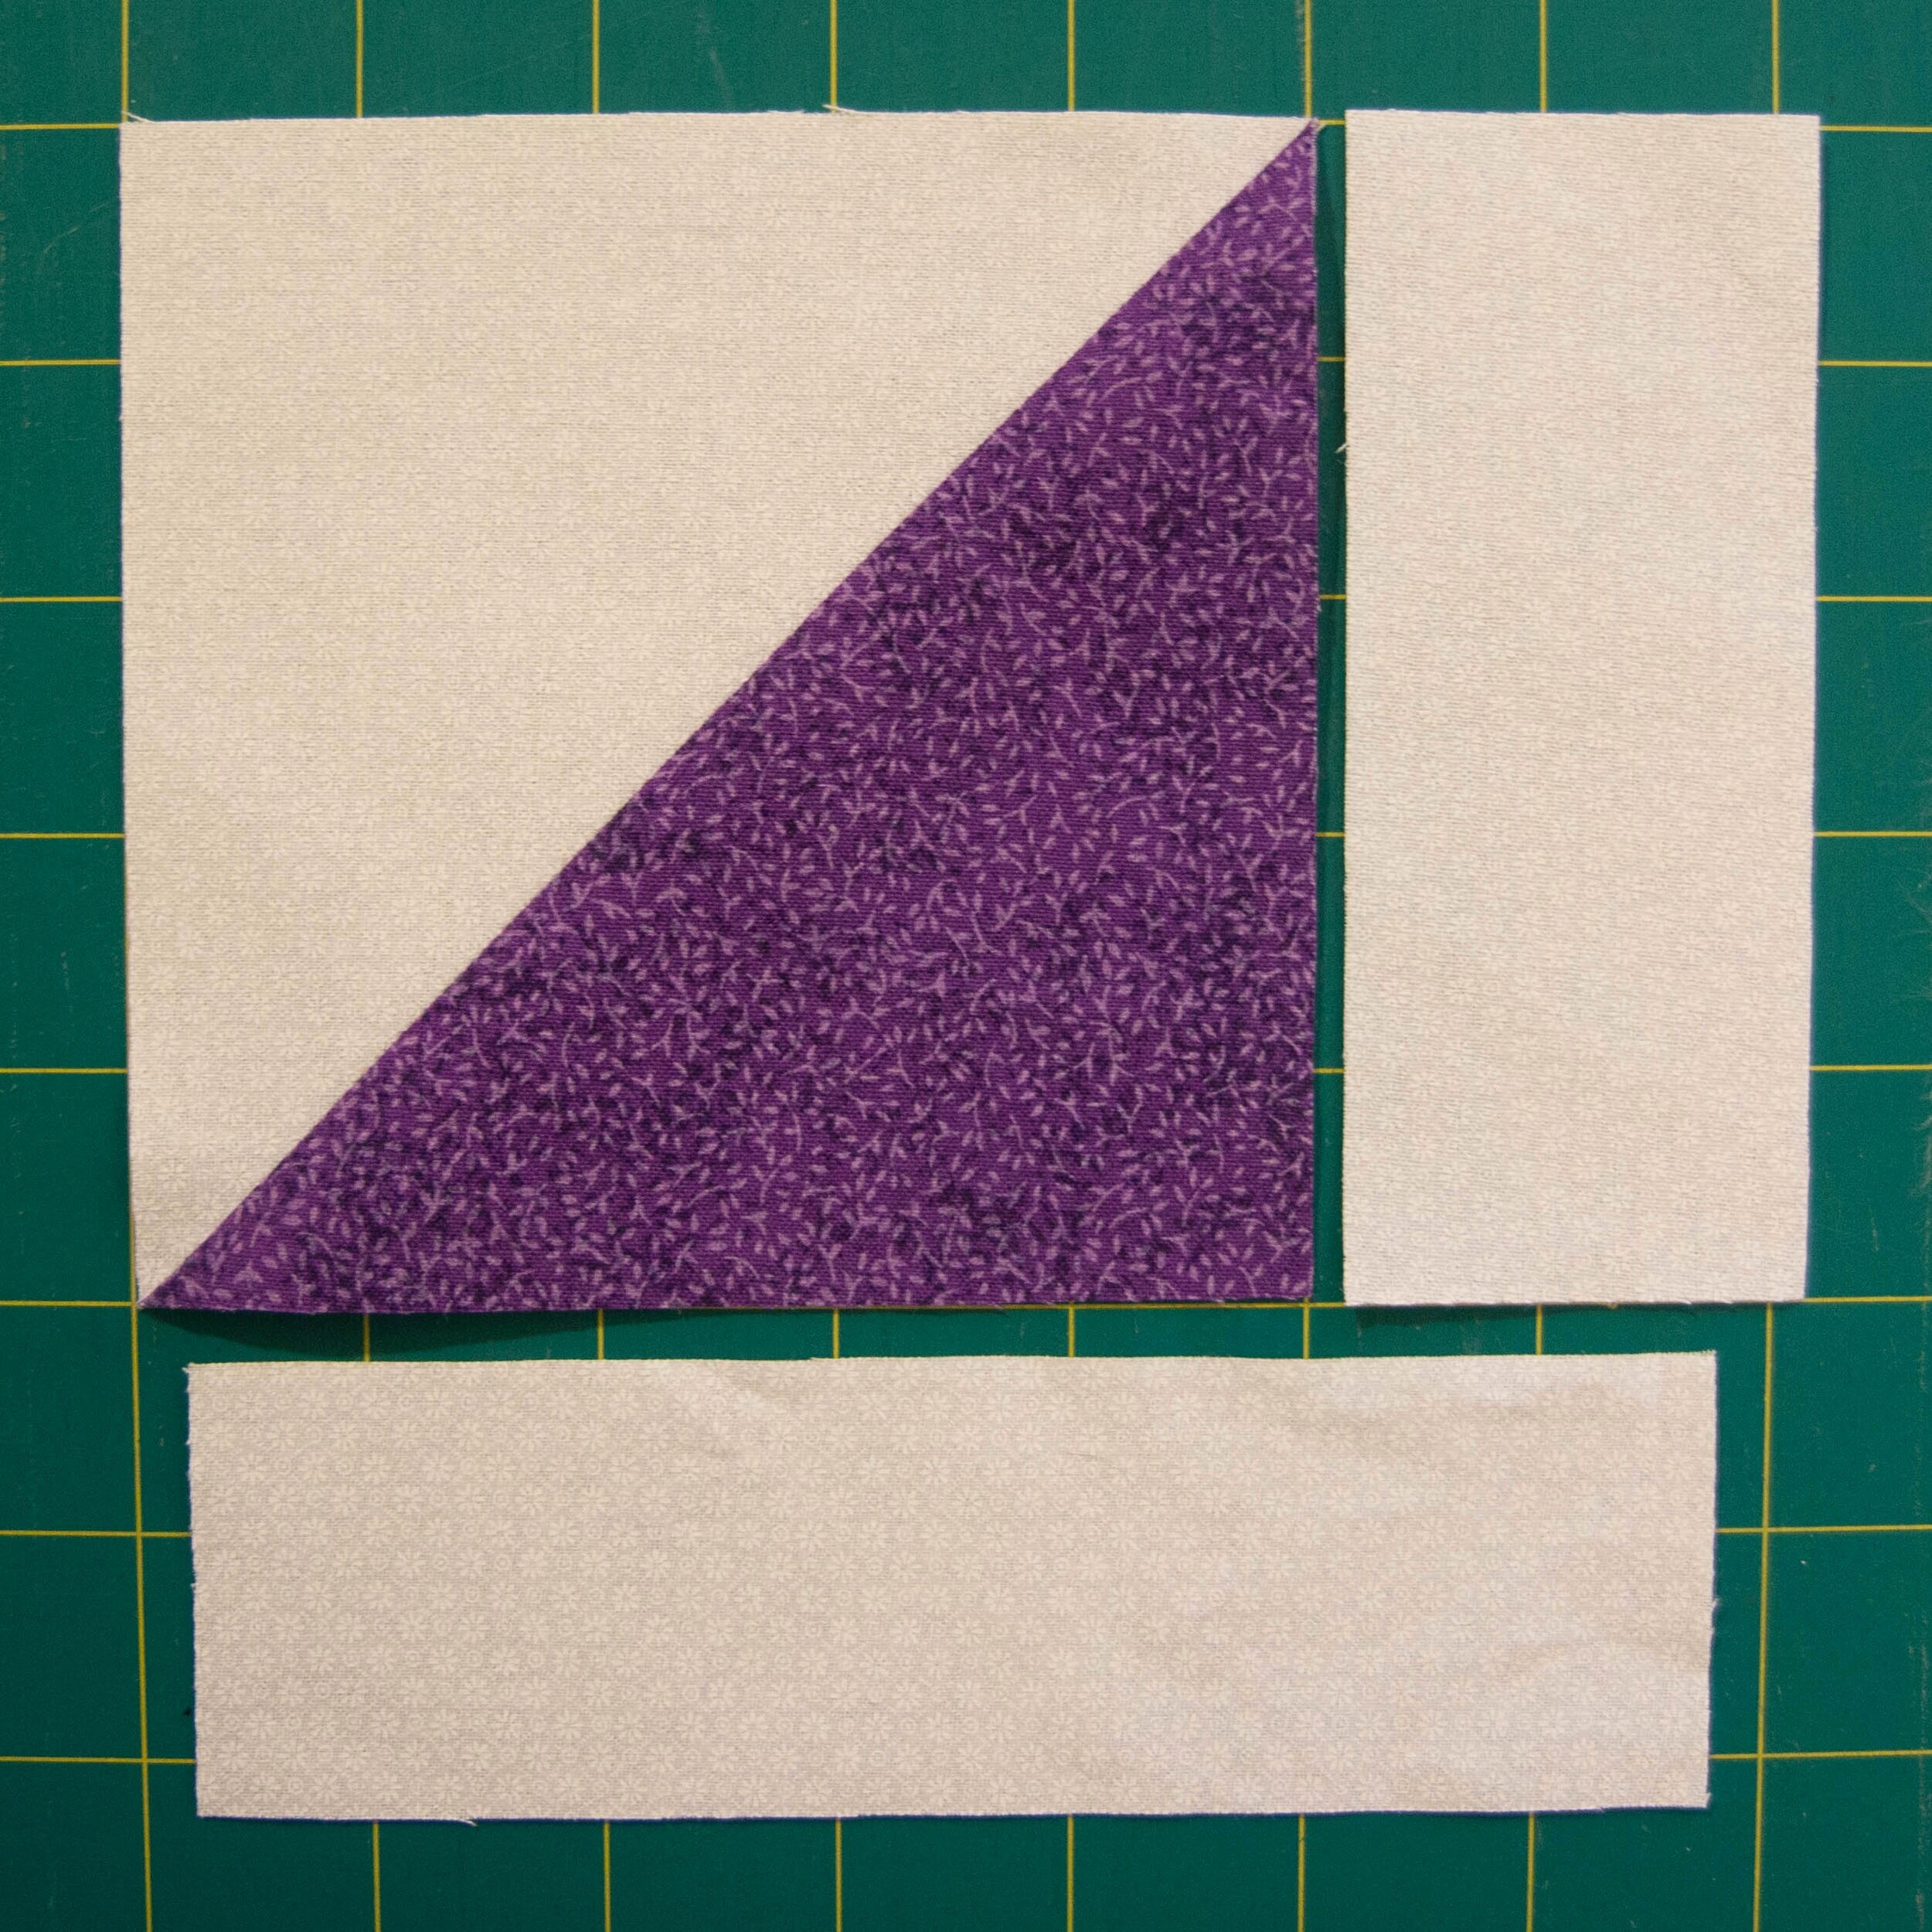
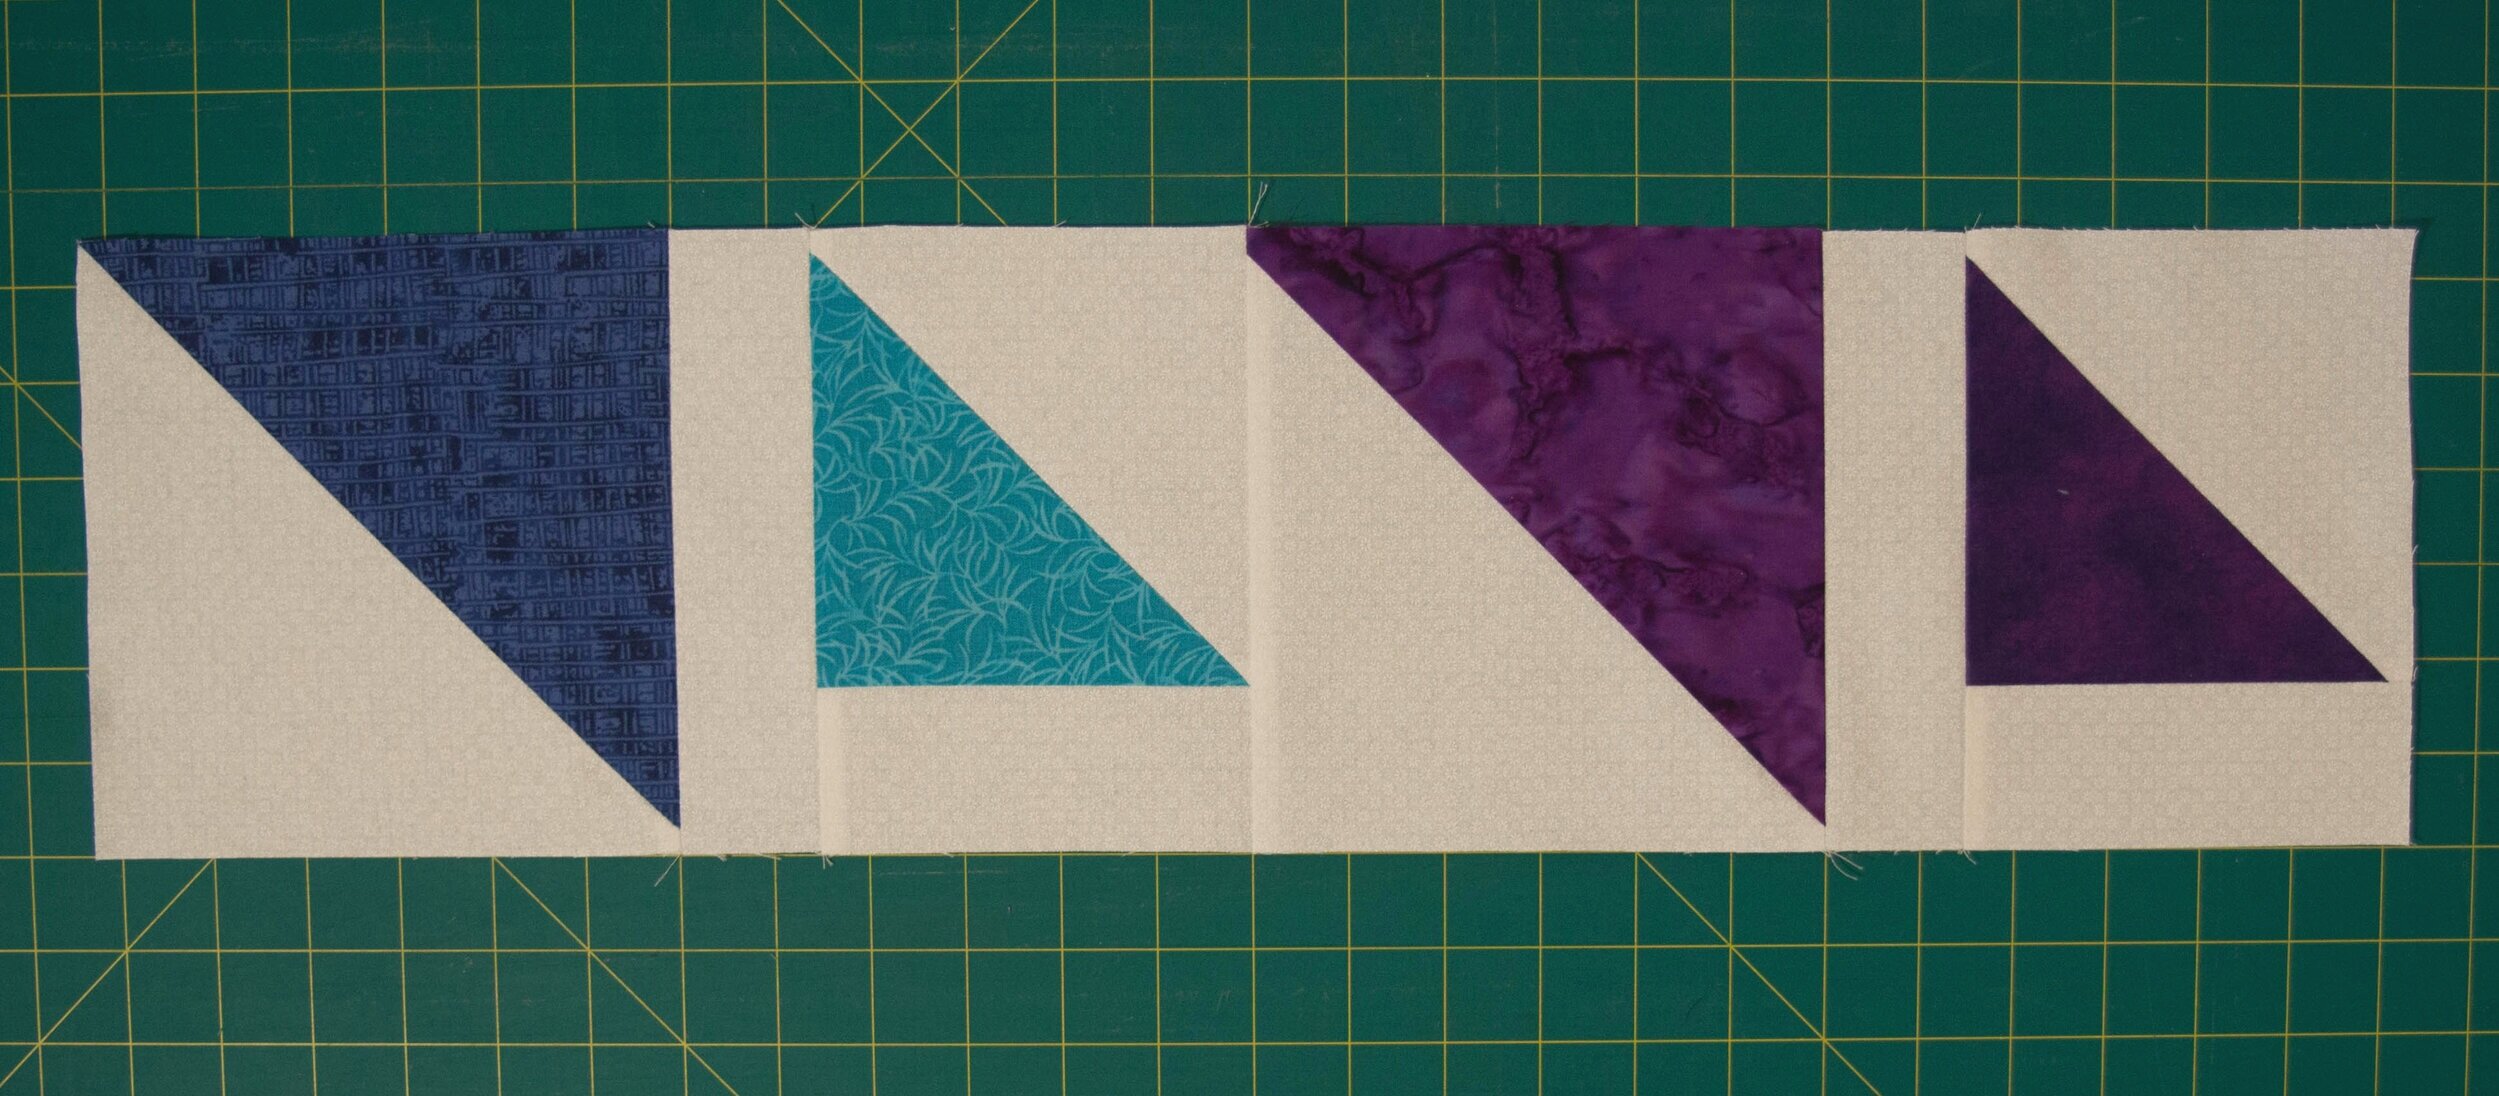
Next you need to make your small HST blocks the same size as the large ones by adding on those rectangles you cut.
- With the coloured half of your HST on the bottom right lay the rectangles as shown below, the 2 x 5 on the right and the 2 x 6½ along the bottom.
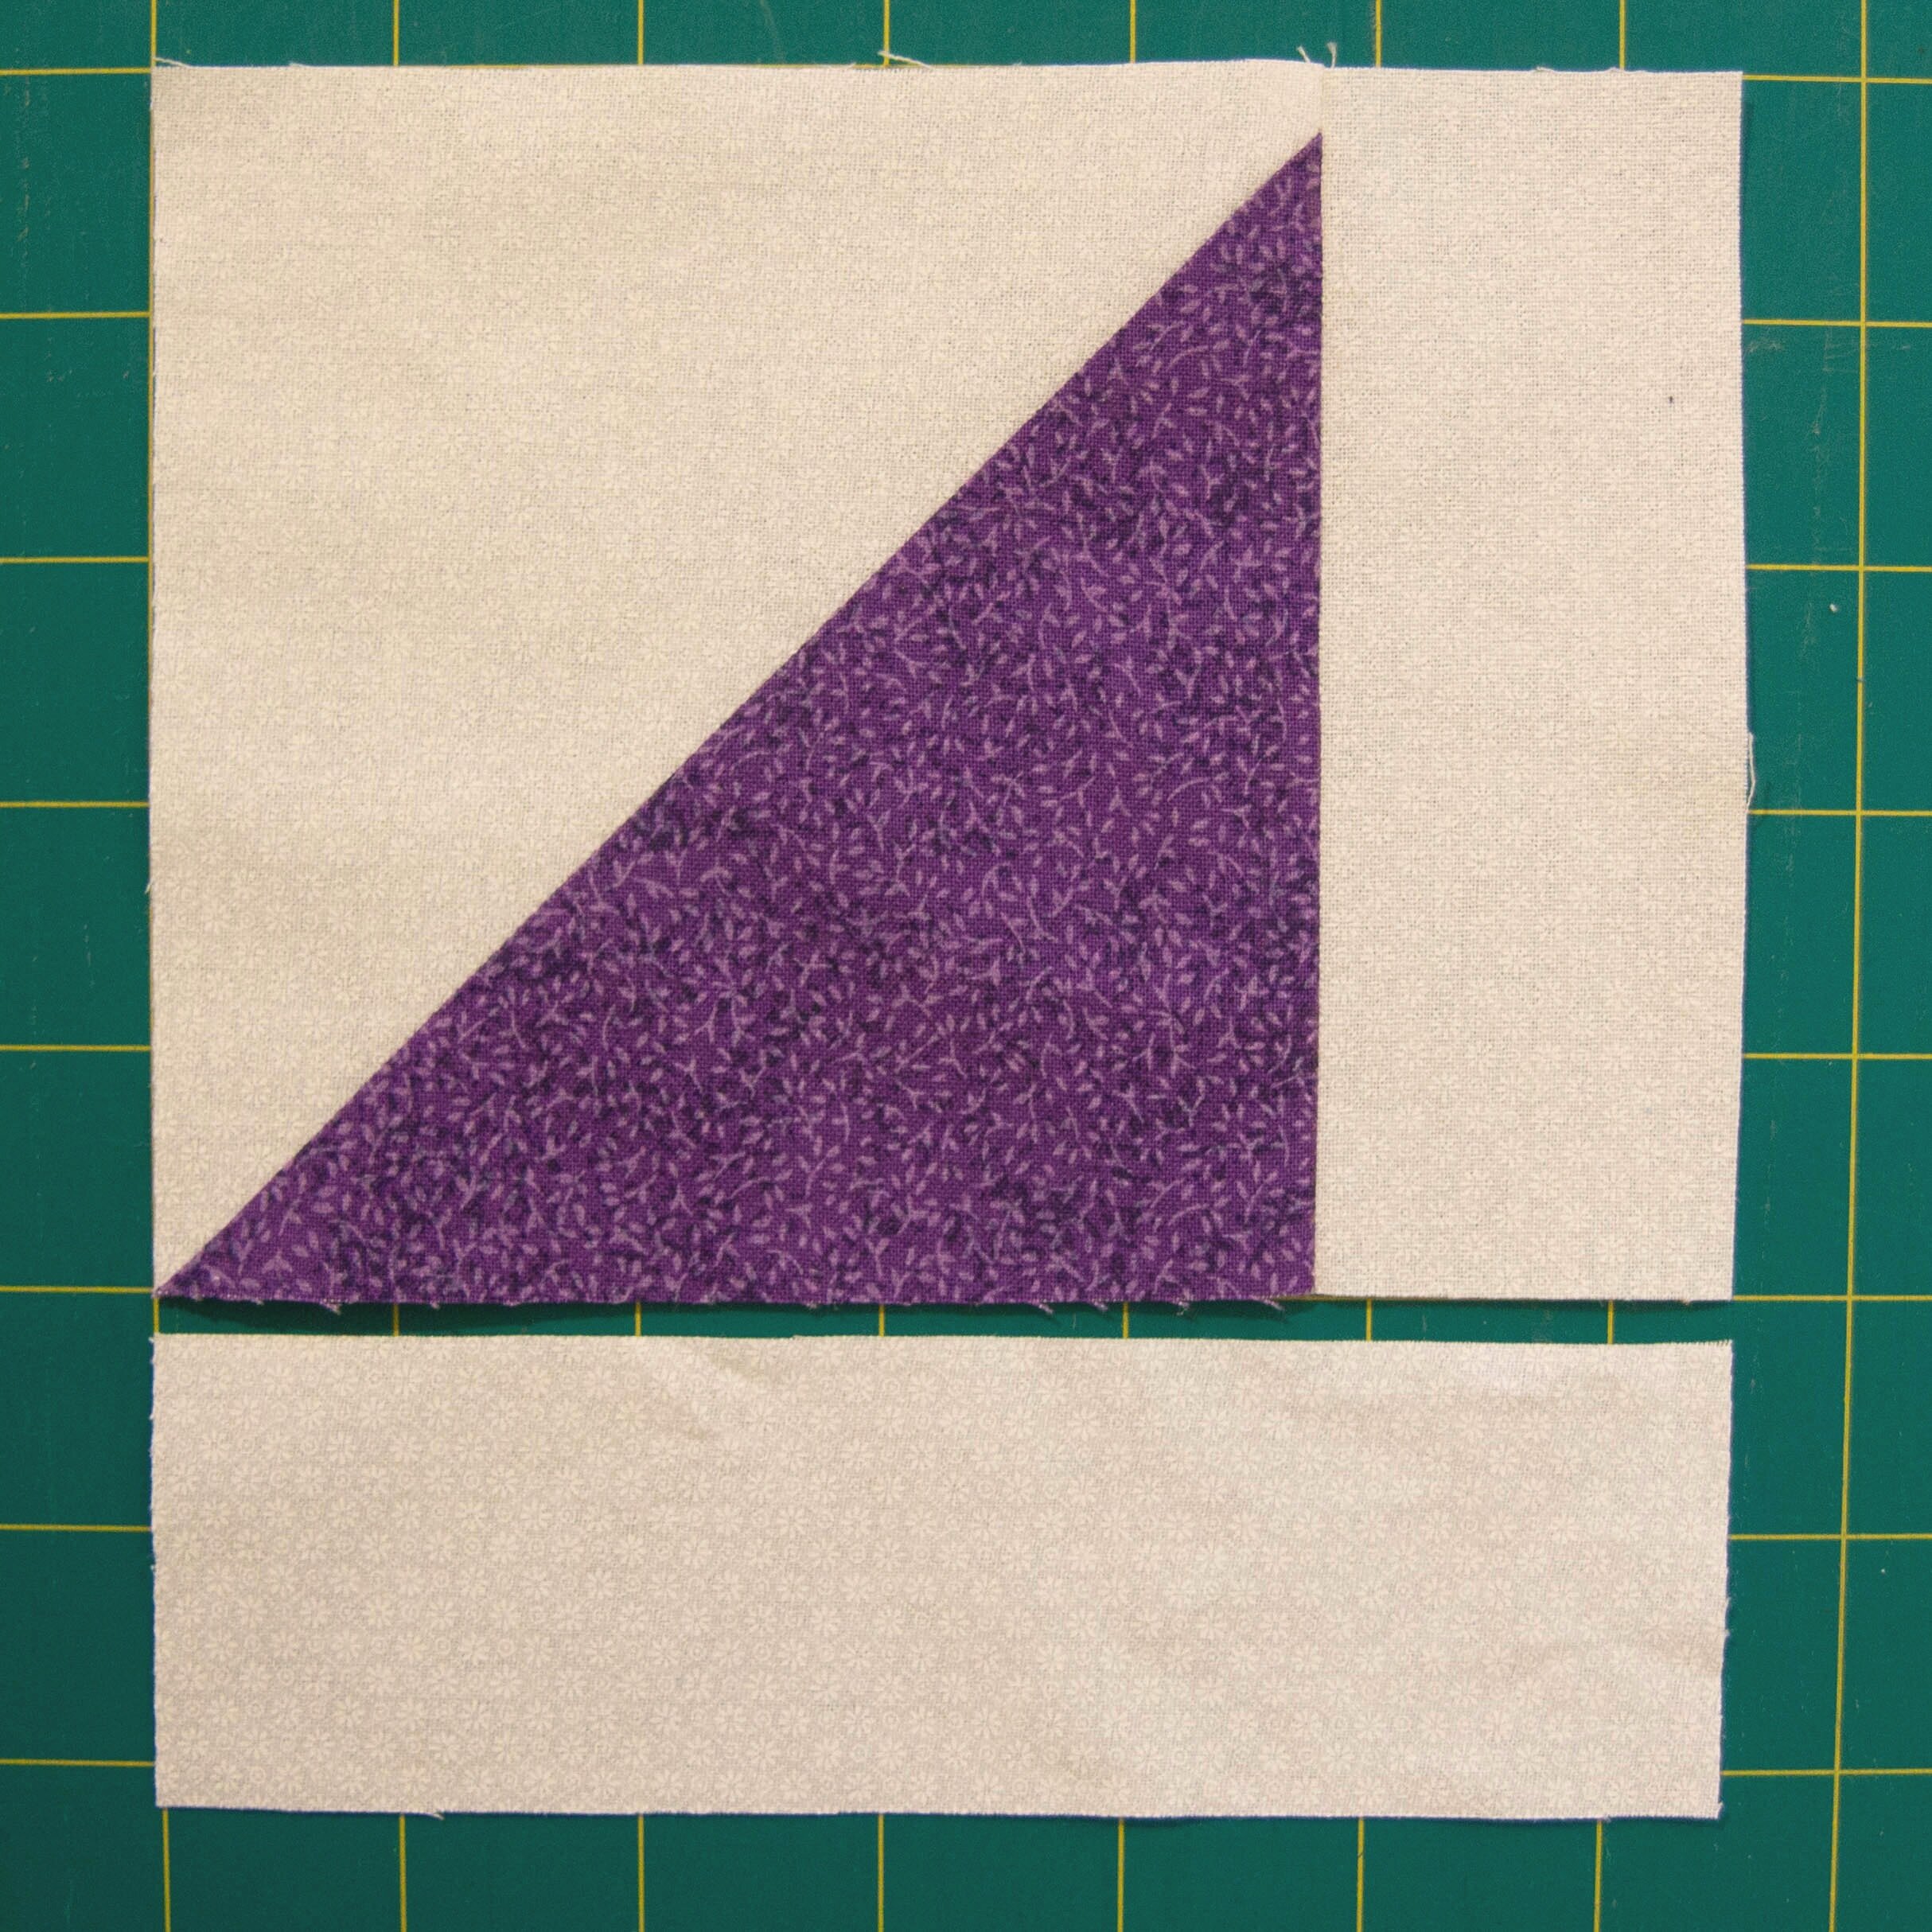
- With a ¼ inch seam, sew the shorter rectangle to the right right of the HST, right-sides-together. Press seam towards coloured side.
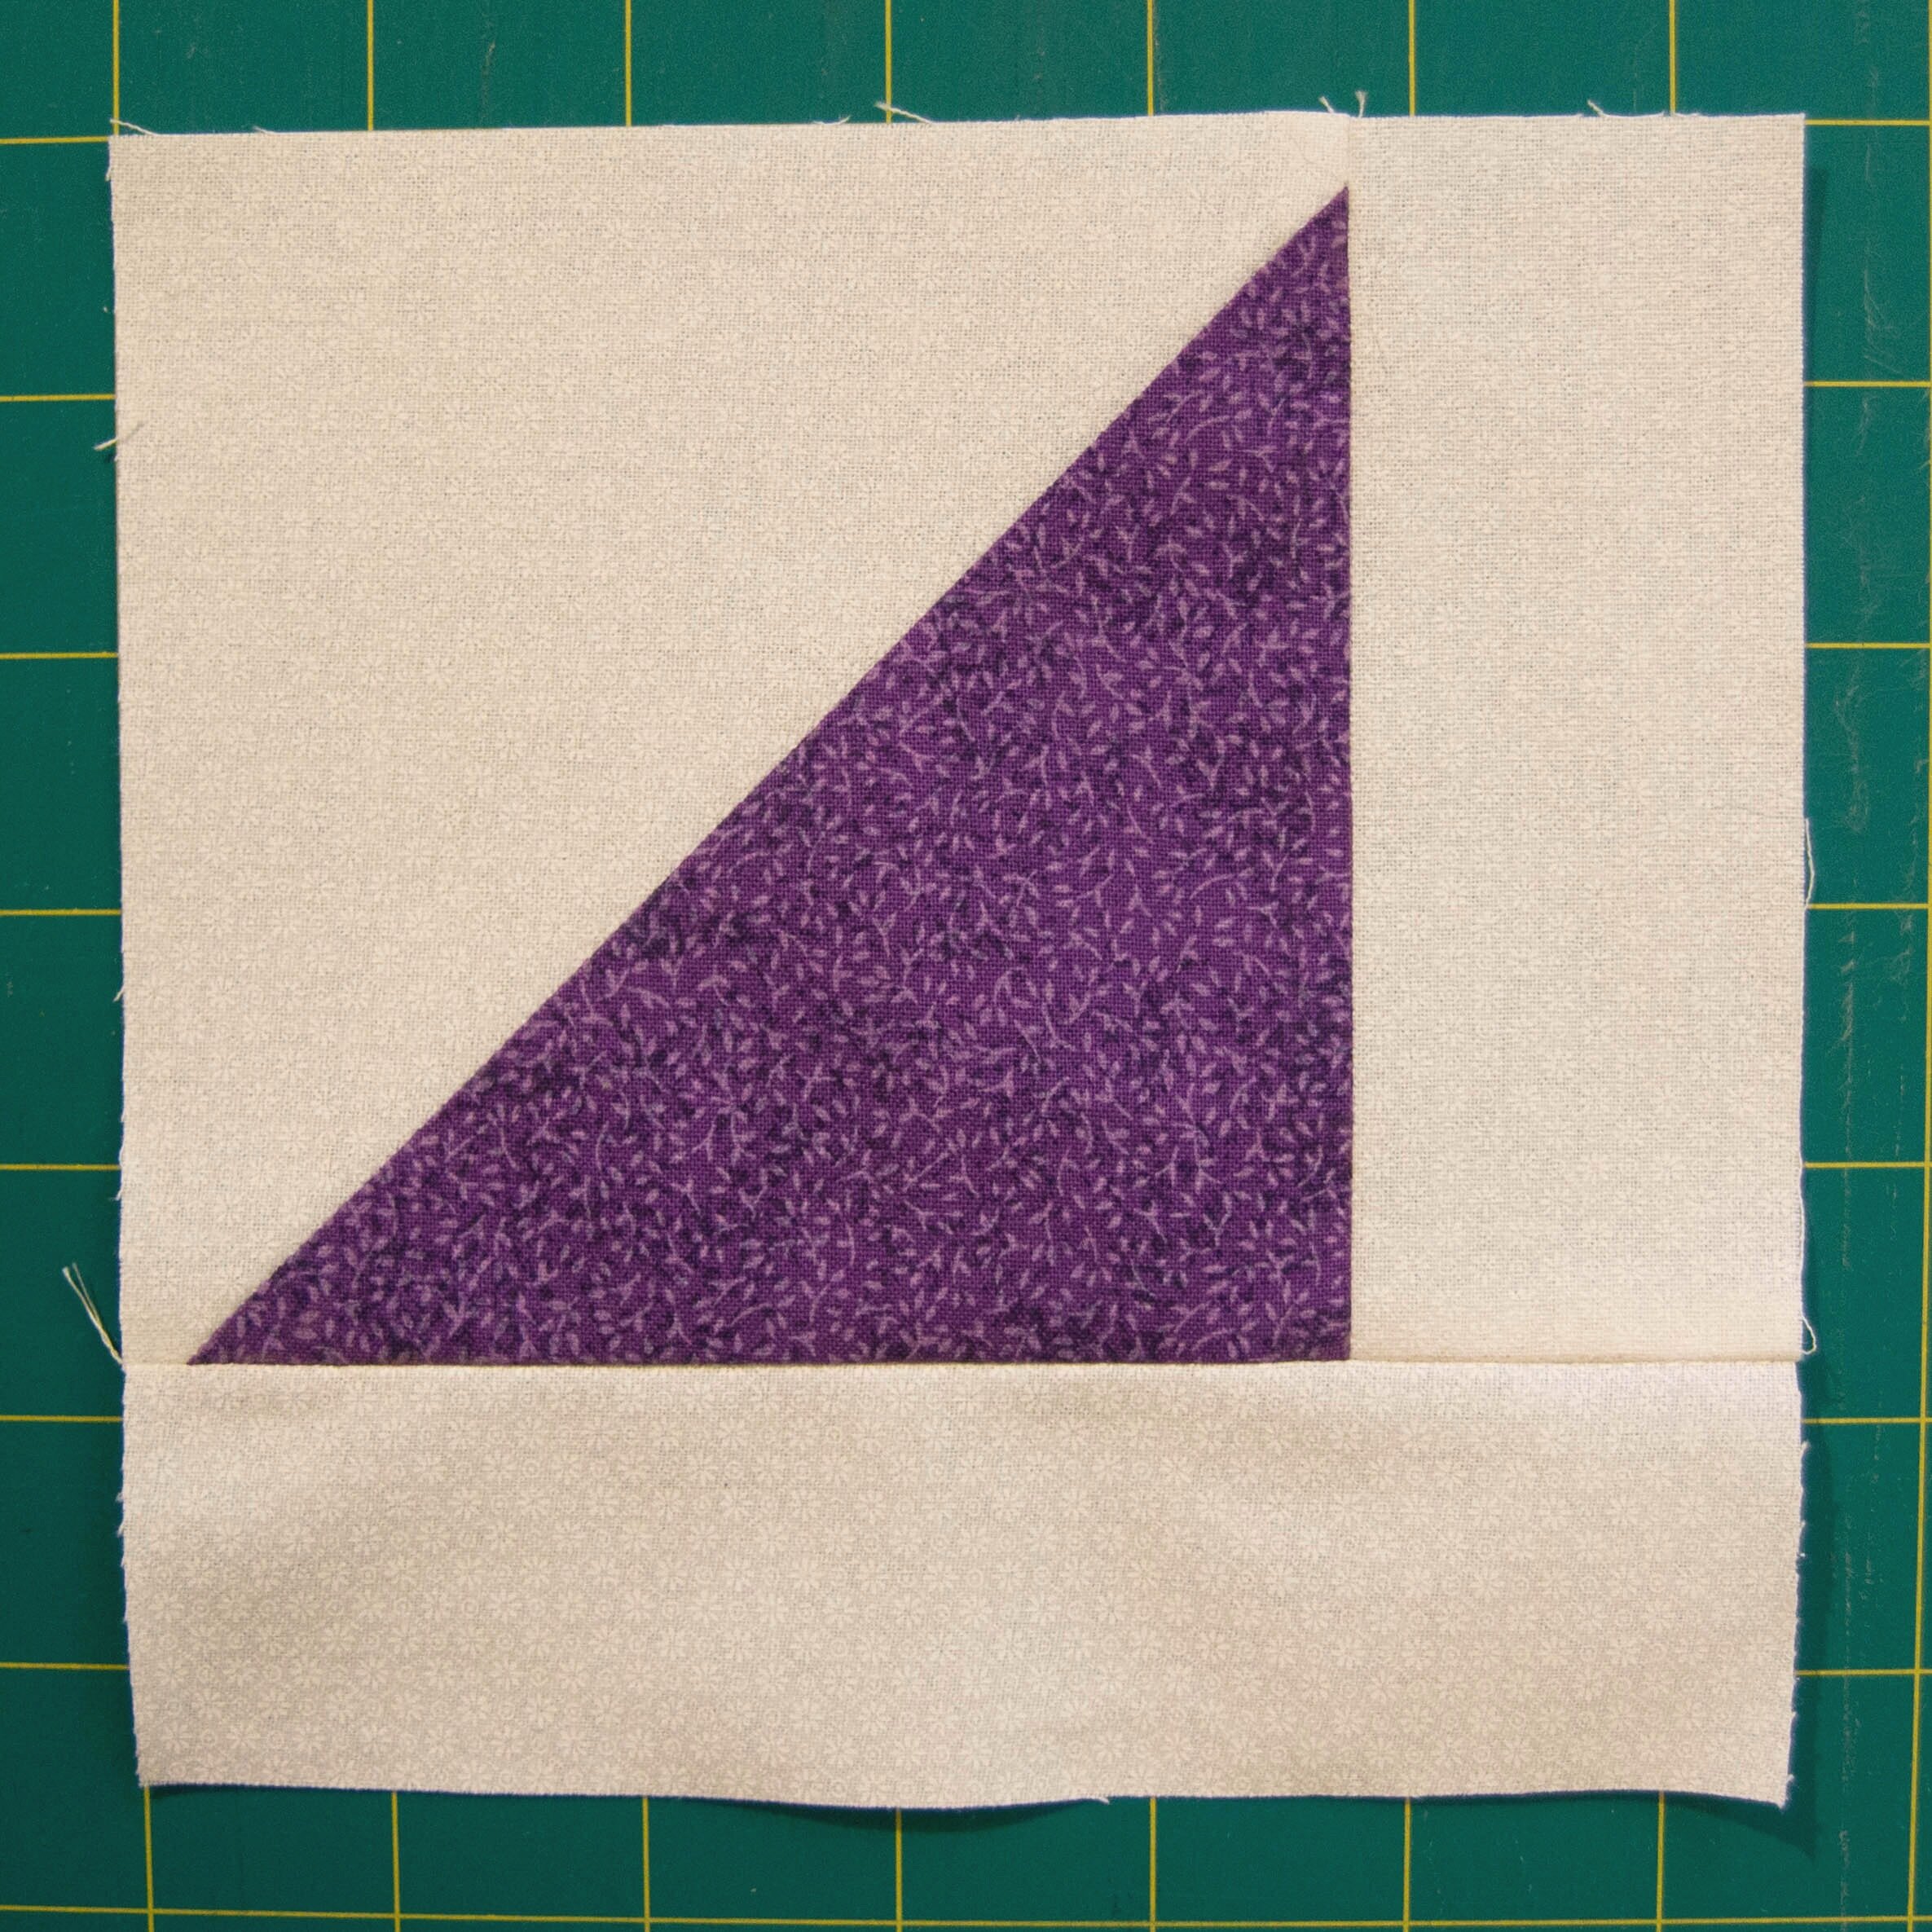
- Repeat with the longer rectangle on the bottom side of the HST to complete your block.
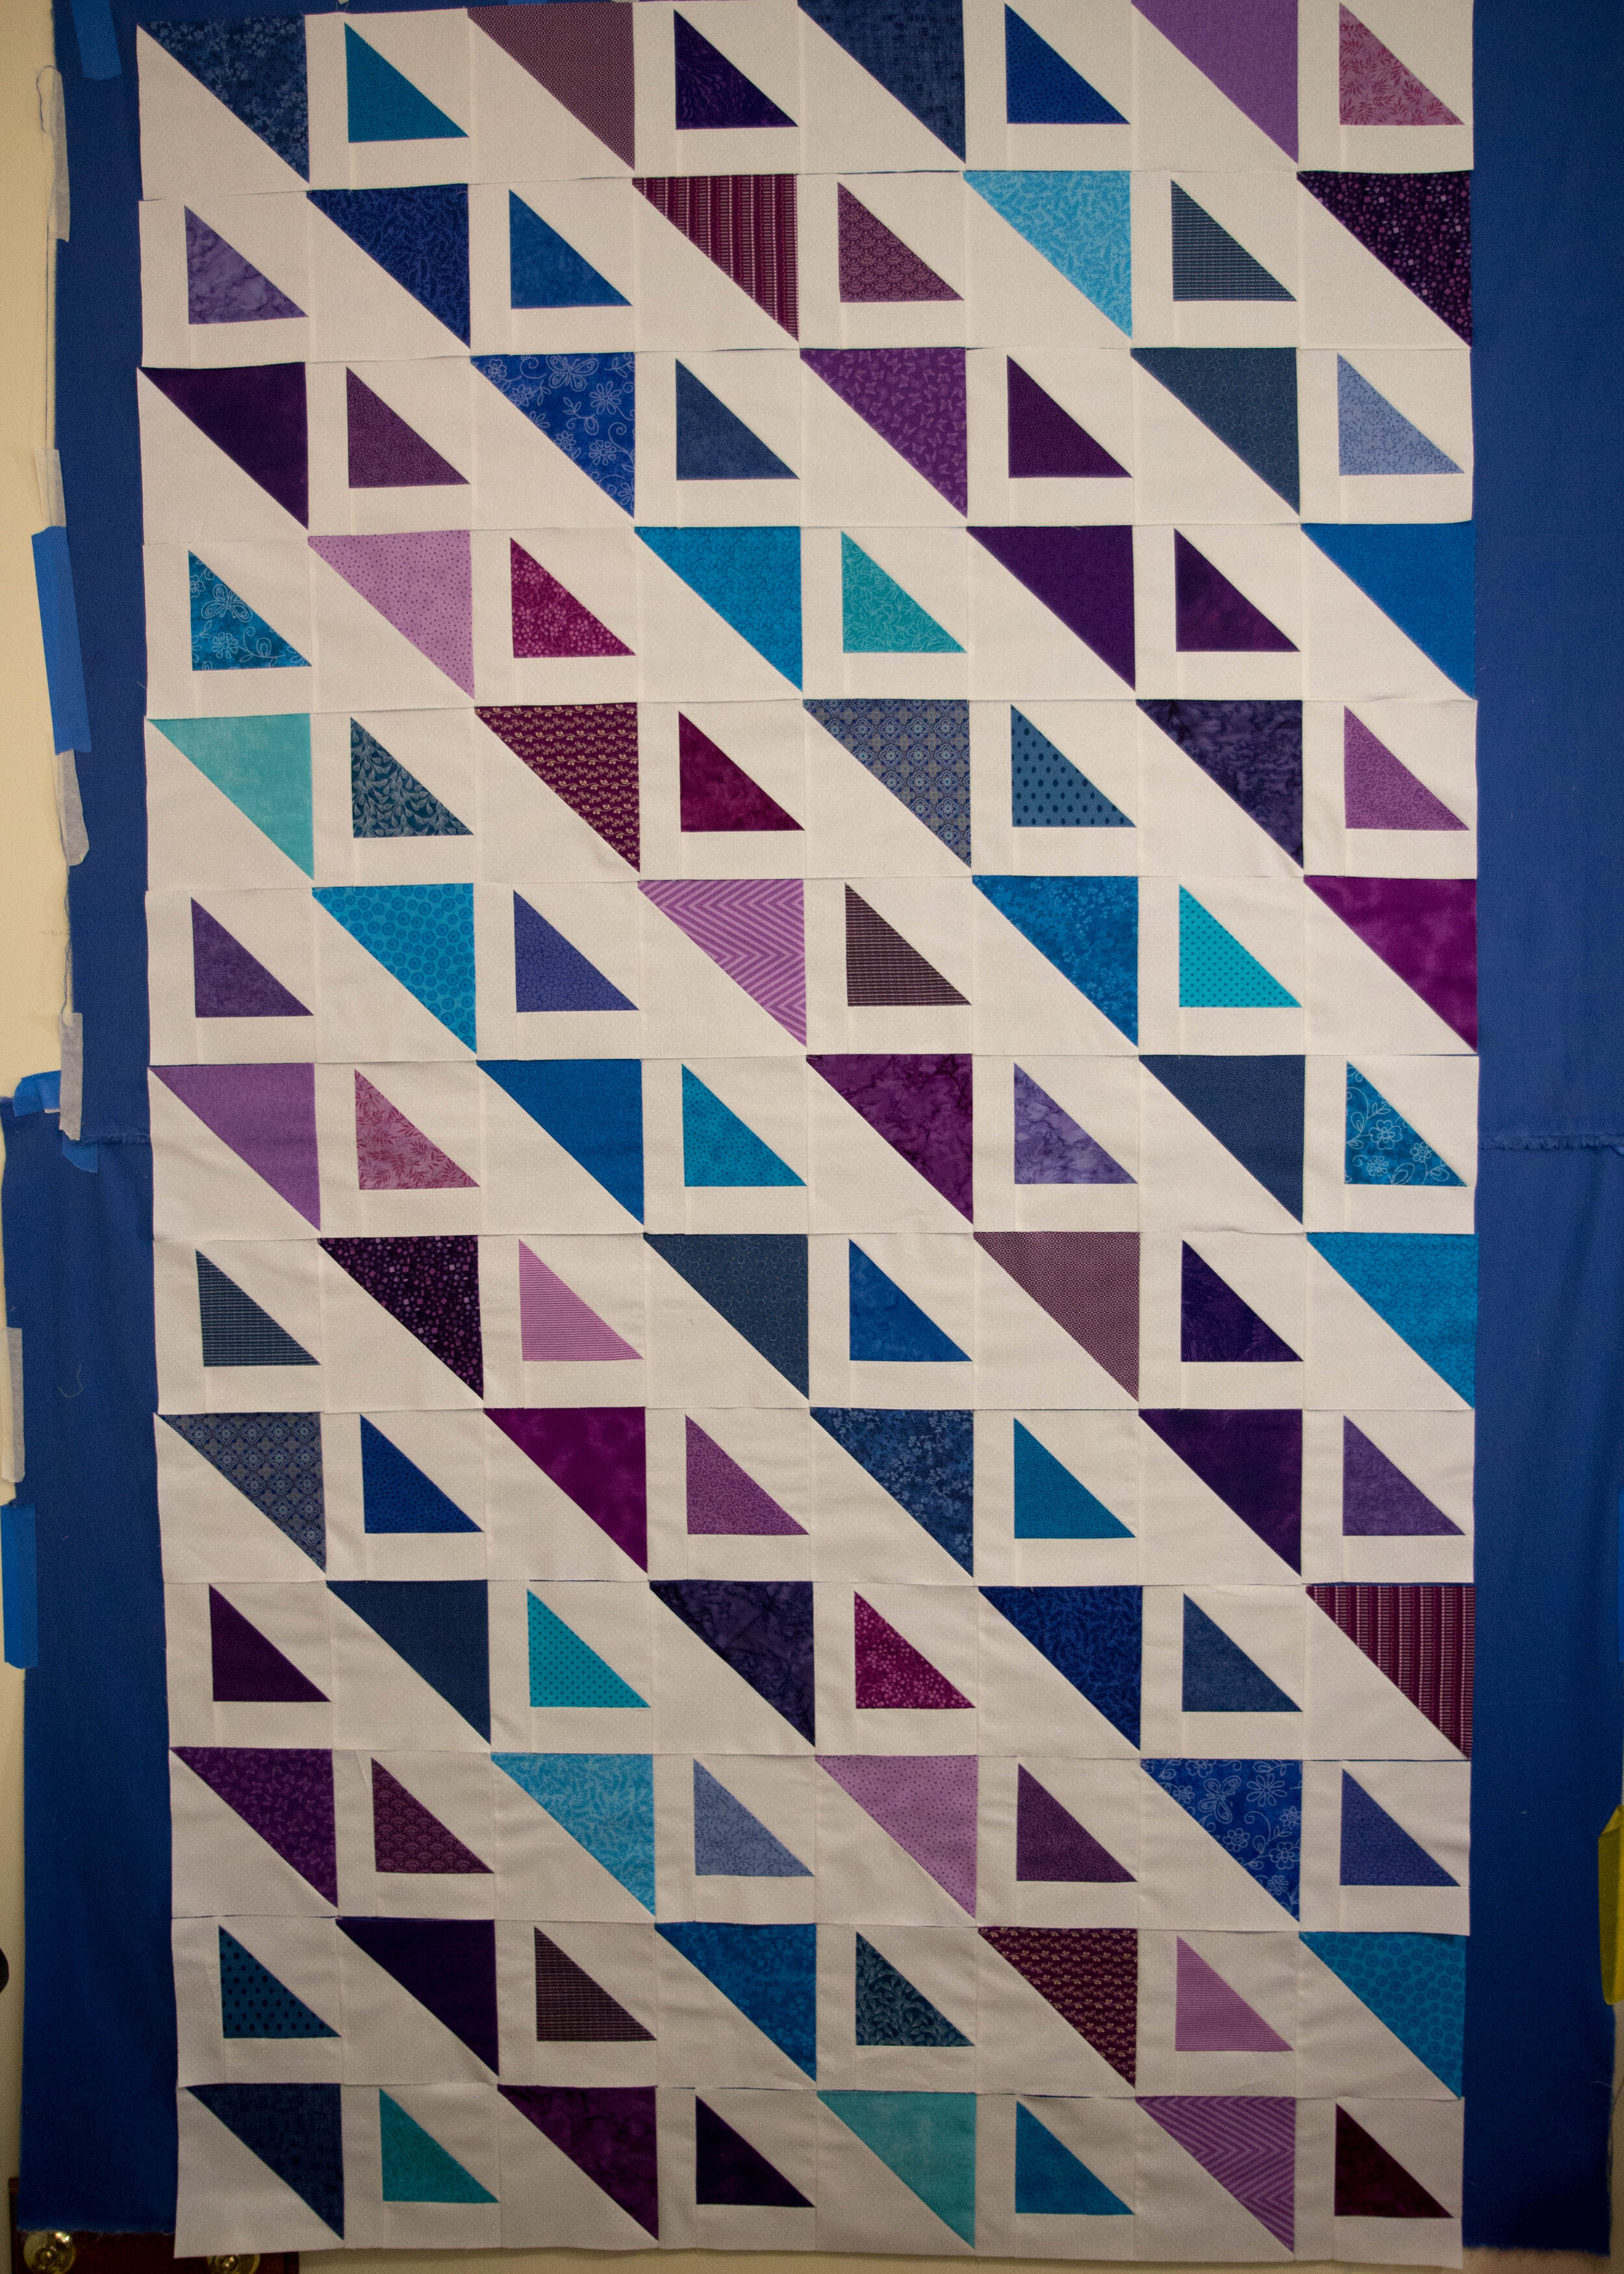
Now that all you blocks are made it's time to lay them all out and the sew them together. I've stuck my blocks up on my design wall (which is just flannelette taped to the wall), you could also lay them out on the floor, on your bed or a large table, wherever works for you is fine.

Once you have your blocks laid out the way you like you need to start sewing them together in rows.
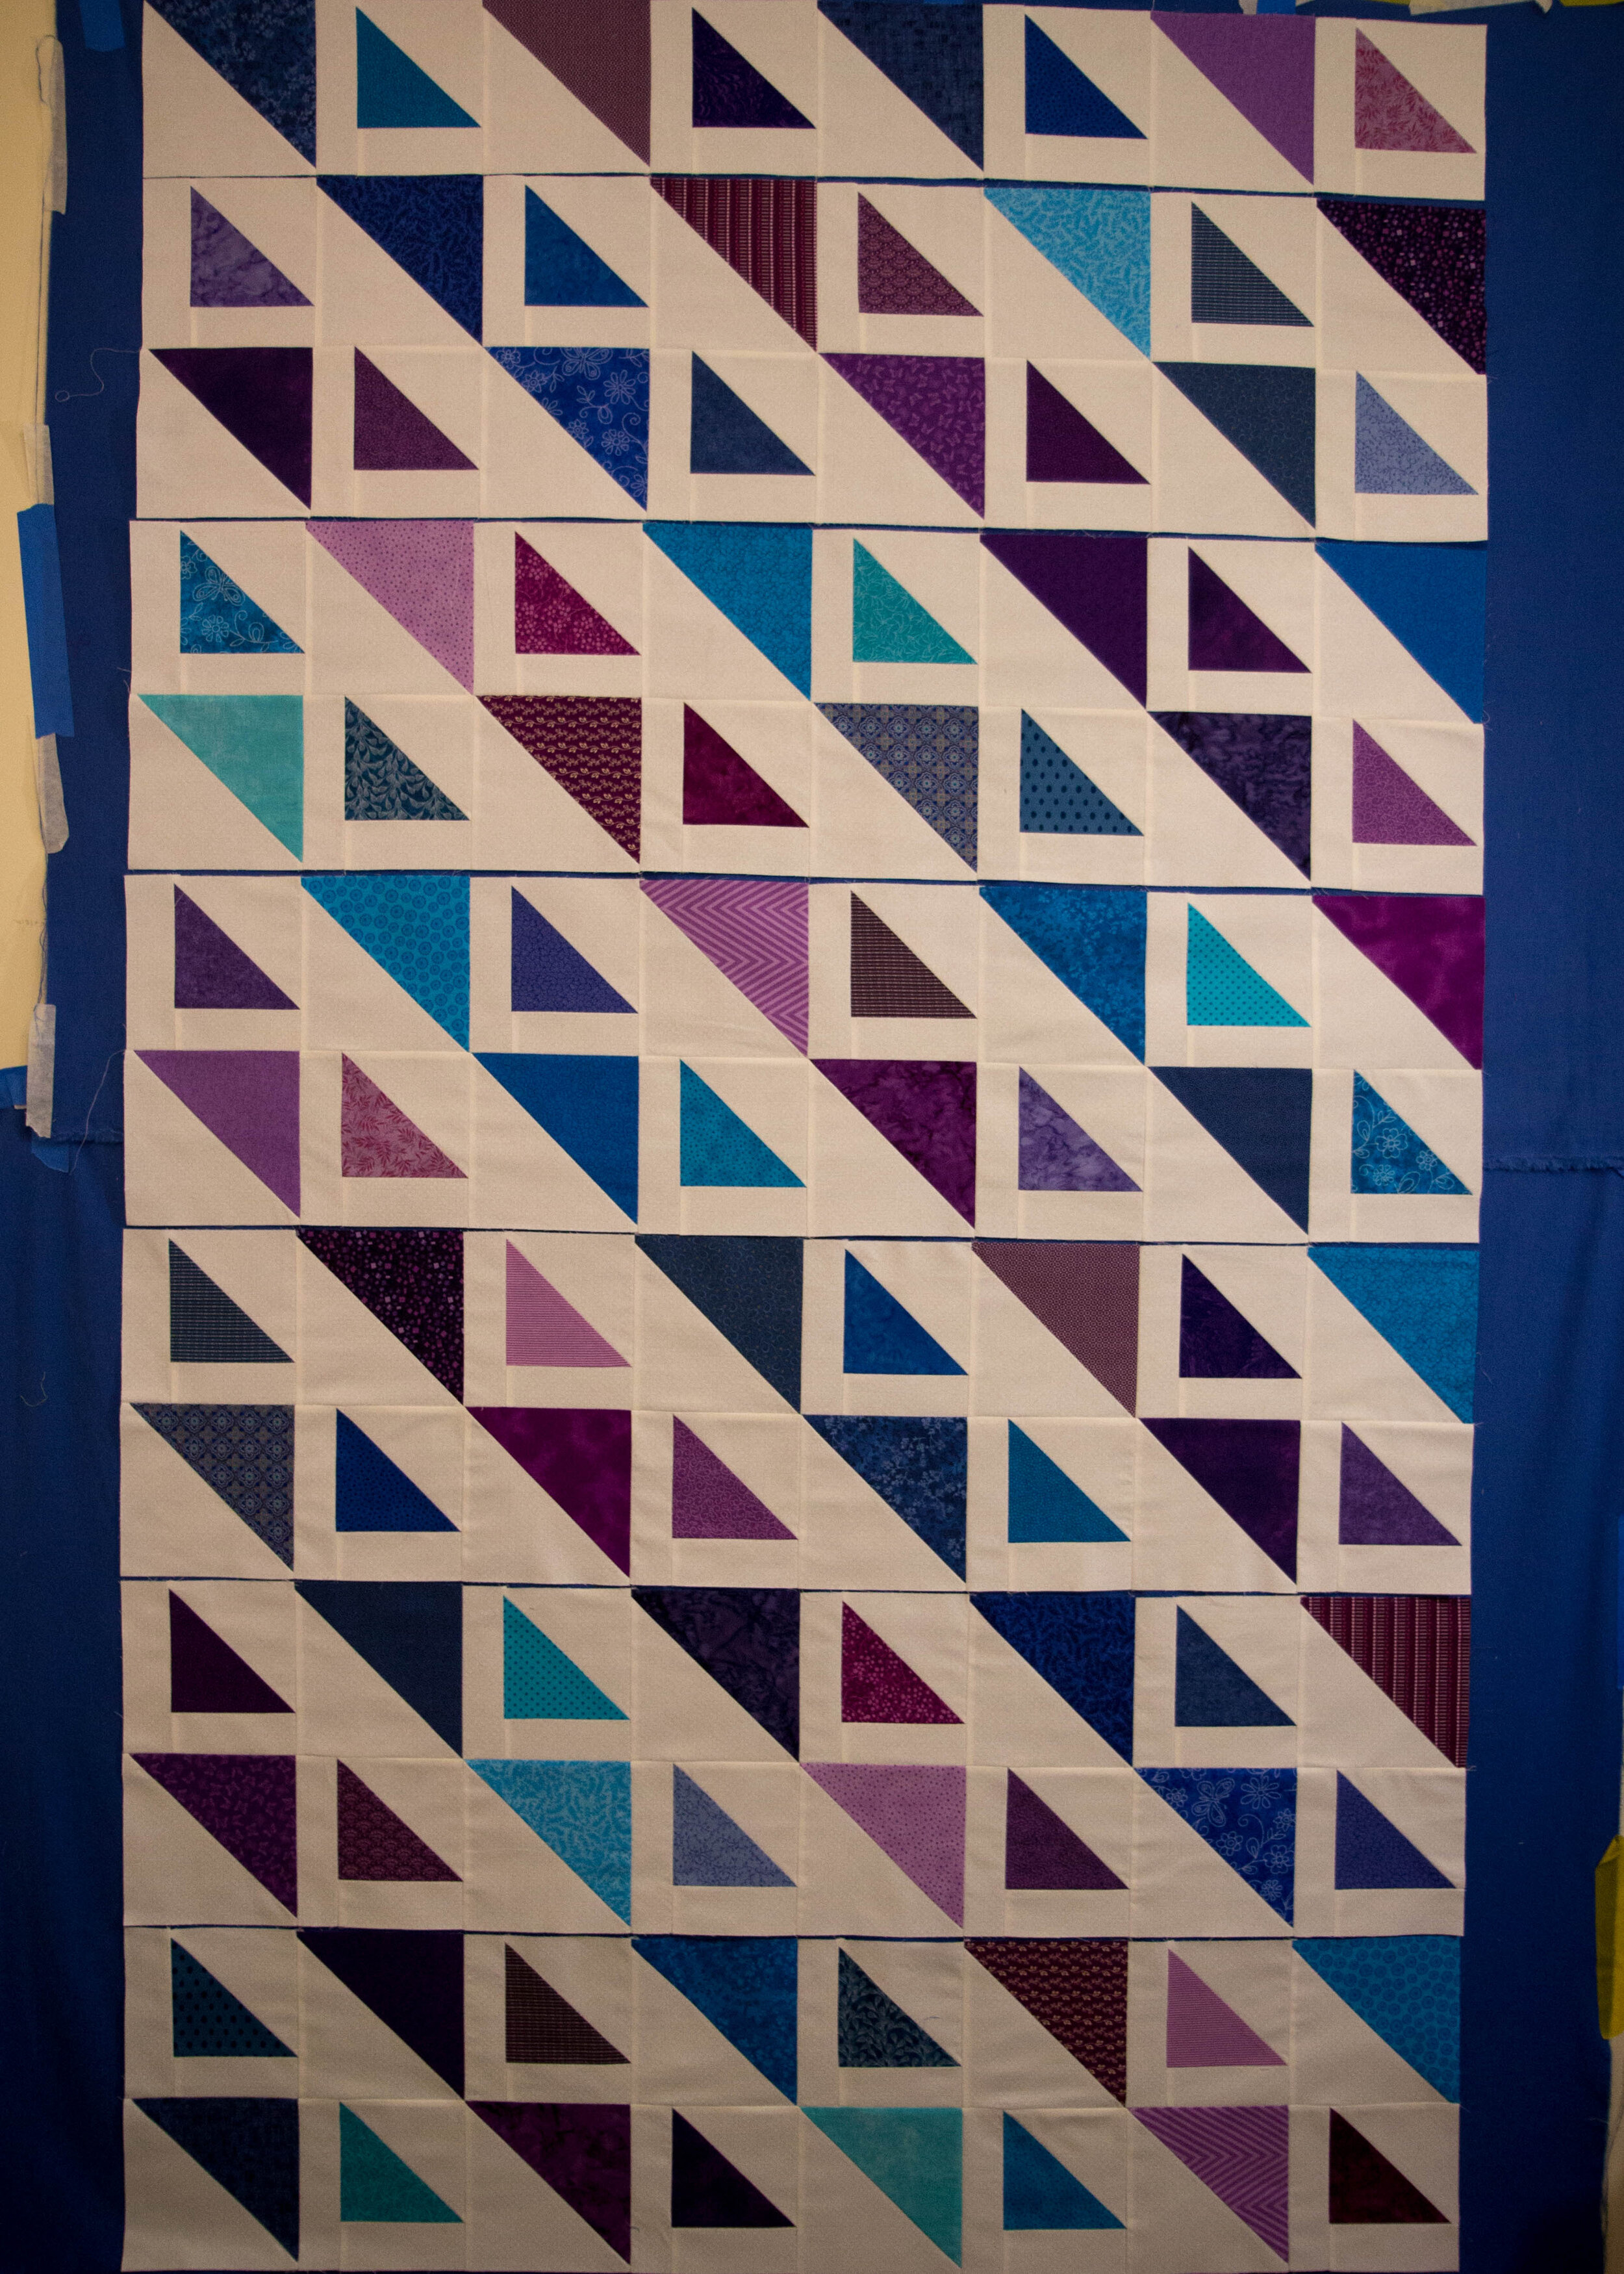
- Sew all the blocks in one row together with a ¼ inch seam, pressing seams towards the larger triangles.

- Once the rows are complete, sew these together also, carefully matching the seams at corners. Pressing all the seams to the larger triangles when putting the rows together will ensure that the two seams coming together at each corner will be pressed in opposite directions, making it easier to nest them together, giving you perfect corners.
- I find it easier to sew the rows together in pairs and then altogether, but you can just start from the top and work your way down if you prefer.
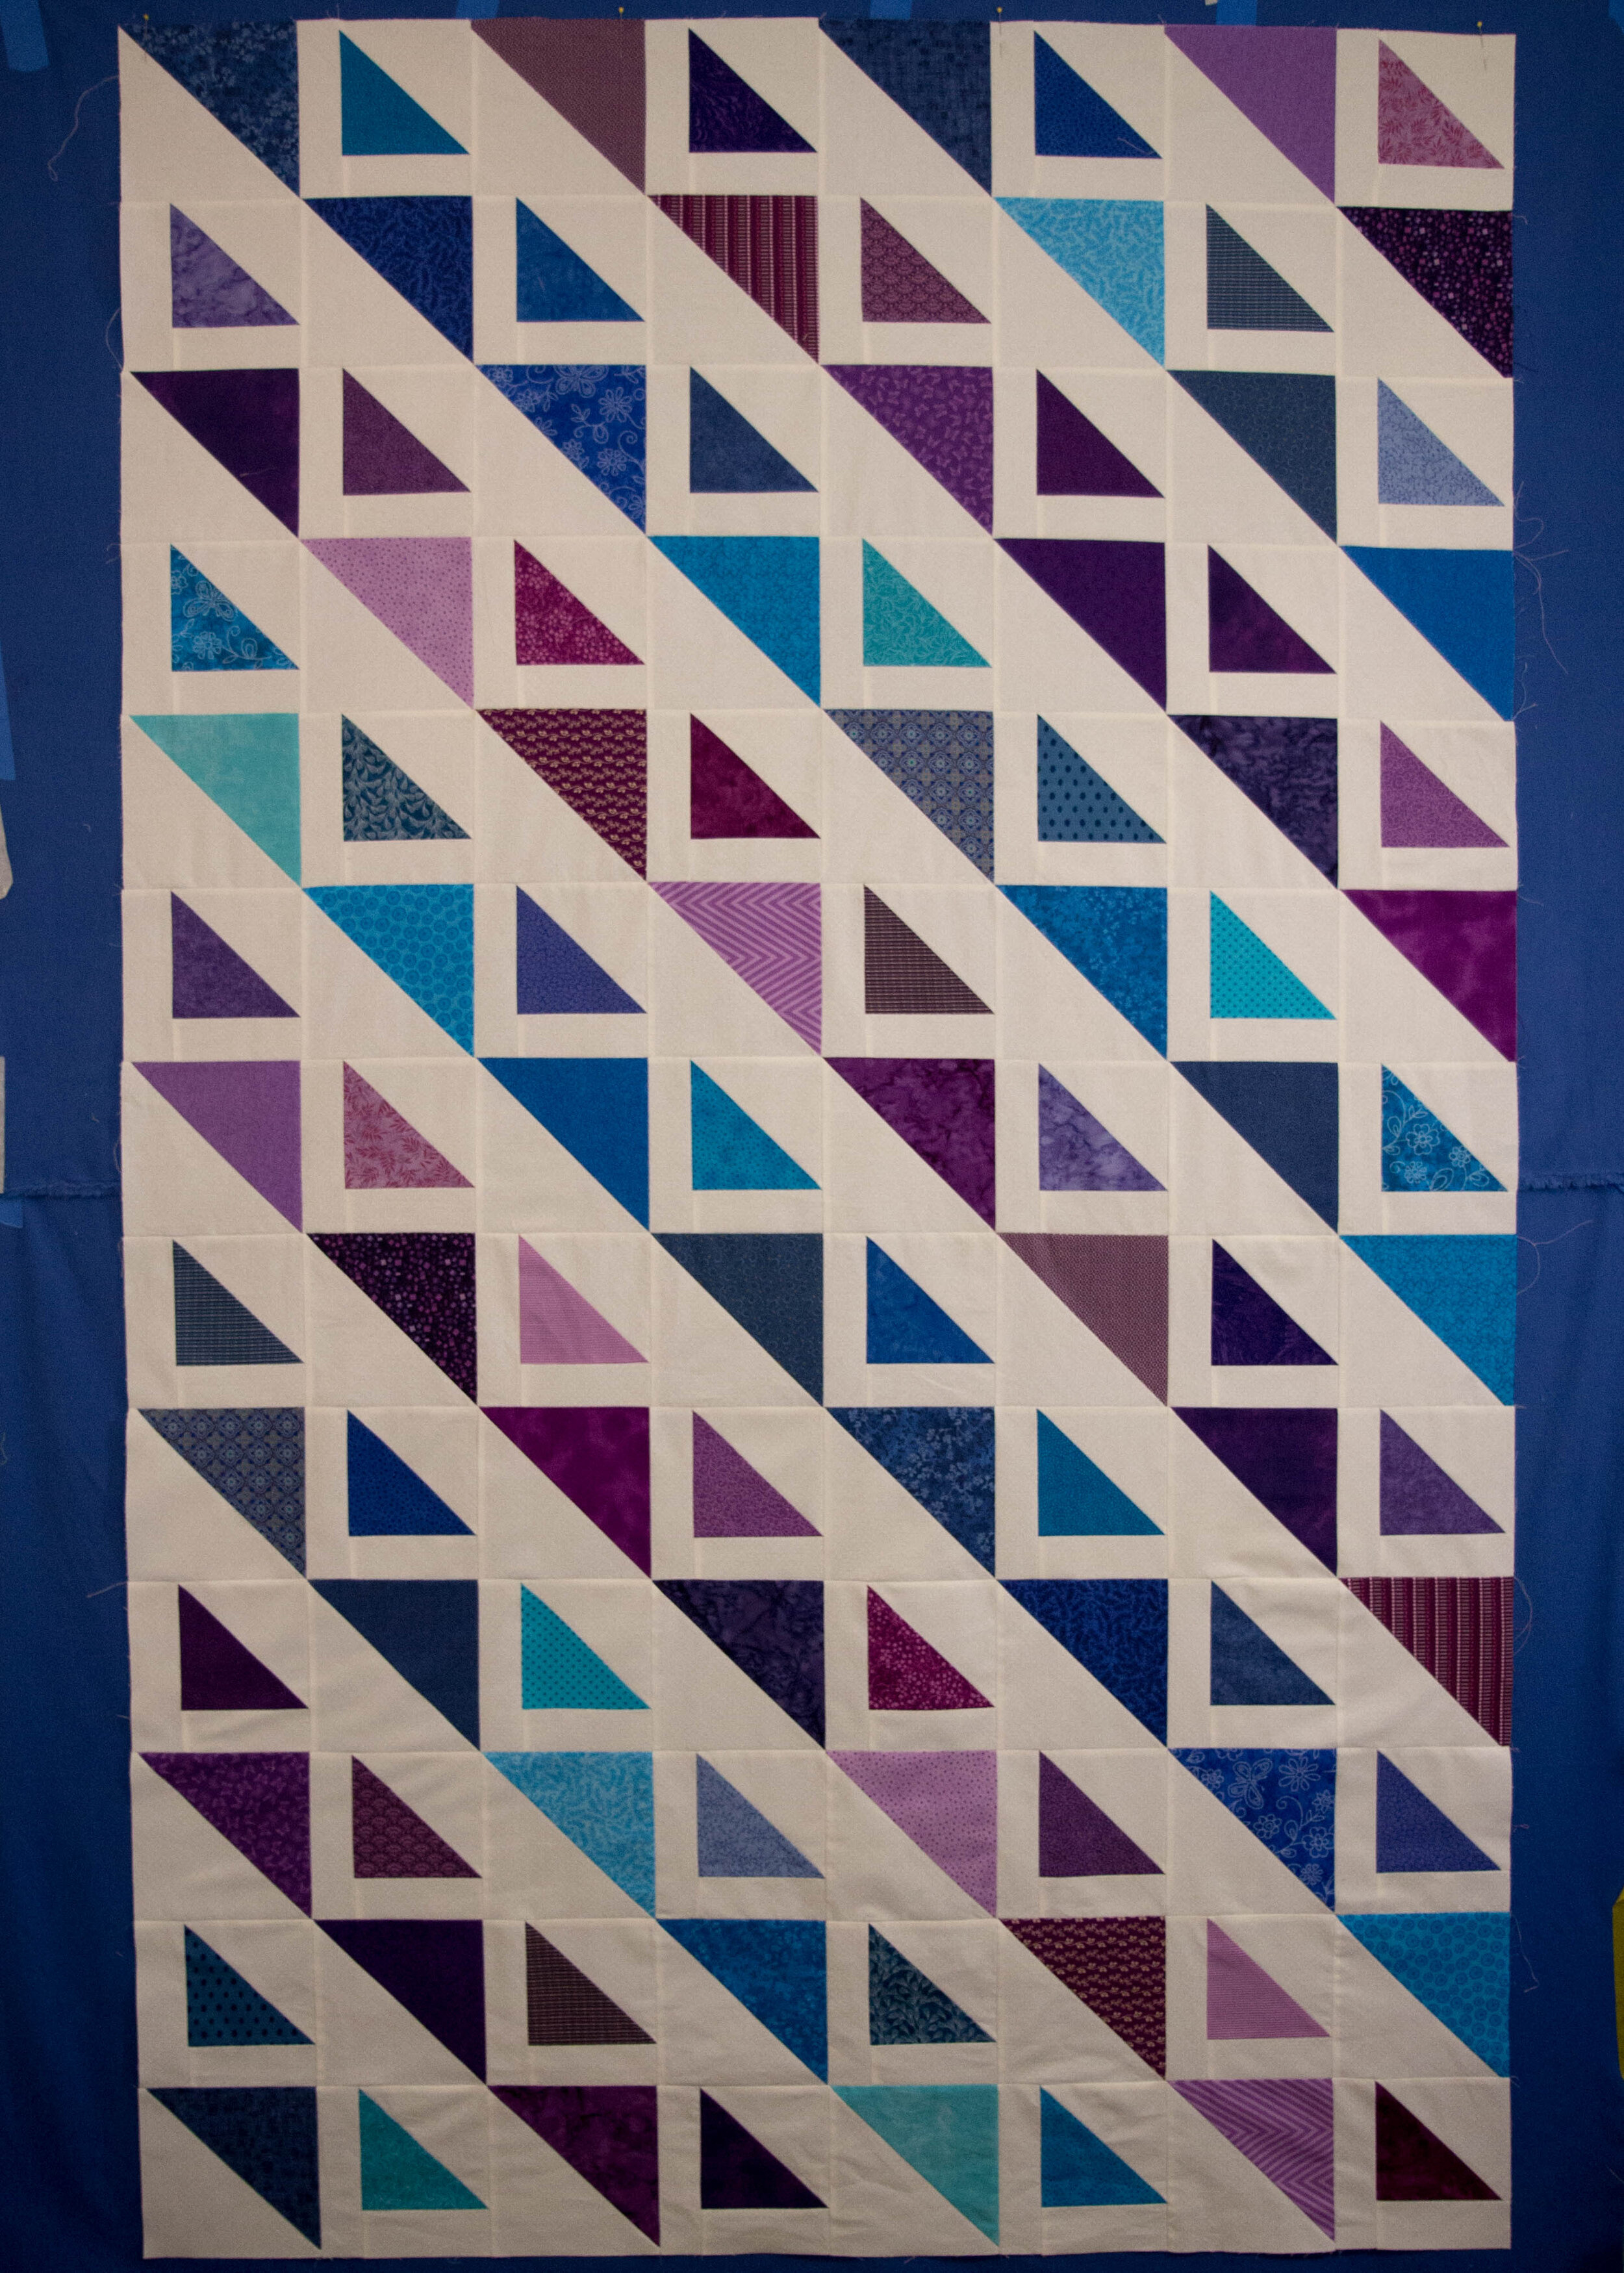
All that's left to do now is add a border and then your quilt top is finished.
- Cut two strips 3½ x 78½inches and sew one each down the two longs sides of the quilt top.
- Cut two strips 3½ x 54½inches and sew one each along the top and bottom of the quilt top.
- If, like me, you don't have any fabric long enough for the borders just join two 3½ inch strips together.

And so your quilt top is finished and ready to be sandwiched, quilted and bound. I had some fun trying out some free-motion and ruler quilting on mine, but you can quilt yours however you'd like, it's your quilt after all!
Please come over and join us on our Facebook page, here you can keep up to date with what's happening in the Elephants Can't Sew sewing room and share your projects with everyone. https://www.facebook.com/Elephants.Cant.Sew/
Happy Quilting!